Rebirth: Battle Resurrection of Greenbarspec

With just weeks and counting till the Battle for Azeroth expansion I’ve been doing a lot of updating and info searching. It’s come to my attention that I have sorely neglected my blog while life took over. My schedule is still crazy with work, family, etc but I’m at a stable place where a weekly blog post shouldn’t interfere. My blog from this point might take a little more of a change in focus direction. First, there are still great resources out there for the advanced healer to focus in on their class but not much for the entry level healer. Secondly, a lot of what has motivated me lately to get back into the blog business has been the recent onslaught of UI updates and Addons that have been a real fail bomb. Just look at how well the updates to Communities have worked for Blizzard with patch 8.0. In fact, because of this growing interest/frustration on my part, you may notice some very minor updates to some of my UI/Addon posts and pages already trickling in. I love healing in games and I love User Experience and Human Factors/Ergonomics so more of my posts will be discussing the successes and failures of healing and UI design.

Happy Healing!

Healing the Video Gulf

play-youtube-on-tvI begin today with a different take on video based information in WoW, like you know internet TV. What’s internet TV you ask? Isn’t that the thing that has shows like “Lost” and “Burn Notice”? Why would anyone want to watch stuff about a dungeon group running in circles in wailing caverns or a raid leader reaming his raid about standing in the fire? NO! That’s not what those shows are about… I mean, video guides and twitch streamers.

A main tank I raid with was calling out high end raiders that do video streaming of their game play as examples to follow to improve our game play. As a long time player of WoW, I grew-up in the pre-internet days when music was on cassette tapes and cell phones were the size of cement bricks. So, it may come as no surprise that I don’t find video guides or streaming content as useful for me to learn content. I prefer written guides and information databases like you find on wowhead.com. That was one of the main reasons I started writing the healing 101 guides was to provide healing focused information so that you didn’t have to watch all the way through a 5 minute video just to get the high-level gist of the dungeon.

Blizzard recognizes that video resources are a very popular media with the current player base, just see this update: http://blizzard.gamespress.com/BLIZZARD-ENTERTAINMENT-AND-FACEBOOK-TEAM-UP I wonder though how many other players there are like myself who don’t follow streamers and frankly hate when it’s suggested I watch a video guide for a raid boss fight? I know there are a lot of players that find video content useful and enjoyable; it’s nice that blizzard and the community include that content. In fact, I do enjoy watching some of the eSports content such as the arena matches. But what happens when that content is the only resource you have available to you for learning the nuances of your class or learning about a boss fight?

I hope the community continues to recognize that both types of content is useful and enjoyable. As for those players that like to refer to a written account of fights and or the nuances of their healing class, watch this space.

Happy Healing!

To Whom it May Concern: The Process of Guide Writing

Hand with pen writing the words 40 Really Awful Writing PromptsWhile my healing 101 guides prove to be almost if not more popular than my VuhDo Guide(s), the process of writing even basic guides even when there is a lot of material already available is a time consuming process. To pull together one of my dungeon 101 guides, I read the guides produced by various sources such as MMO Champion, Wowhead, healing bloggers, and my notes from my runs in the dungeon. With this information, I open up a draft blog post and outline the dungeon to make sure I capture all of the achievements, boss fights, notable trash and important facts. Then I fill in the prose with information about the abilities and the fights. Next, comes the tedious process of adding in all of the links for the abilities and gear. All told a single Healing 101 guide can take anywhere from 1-3 hours to put together. Not a long process as a writer, but a long time compared to a basic blog post such as this one or the ones I write personally or professionally. I write this post today to let my readers know that though there may be delays in my blog guides and updates, often it is because I’m pulling together multiple sources of information in between real-life events and it’s never a quick or easy process.

I have many ideas for different types of posts and guides, often generated from my own experiences, everything from my post on tabards back in Cataclysm to my most recent post on Emerald Nightmare. So, stay tuned and you might just find something useful and relevant (when I manage to gather all of the info in between real-life events)…

Happy Healing!

The Stuff of Nightmares: Emerald Nightmare Healing Quick Guide

524301-emeralddreamwayWith the opening of the first wing of LFR and having experienced the fights on Normal, I thought I’d actually post my Quick Tactics that were so useful to my success with the fights.

In this Quick Guide I’ll share my quick tactics from a restoration druid perspective for each of the 7 bosses. I’ll include any hints from the other healing perspectives if they are particularly useful to that fight. Keep in mind to always follow Rule #1 of Raiding: Don’t Stand In It. I won’t call out all of the things to not stand in unless it’s something to really watch for amongst all of the other stuff on the ground.

Notable Trash before Nythendra: Pull each of the five Gelatinized Decay oozes that patrol around Nythendra individually. If an interrupt is missed on the Wave of Decay you’ll want to have lots of AoE and possibly cooldowns ready.

Nythendra
In using the quadrant strategy, spread loosely in the starting quadrant and be ready to run out if targeted with Rot. Keep an eye on the tanks and melee for stray Infested Ground patches. When she goes to cast Infested Breath, move over to the other quadrant. After every second breath, move into the ‘clear’ zone and watch for the Corrupted Vermin to stay out of their AoE zone.

Notable Trash before Ursoc: You’ll need healing cooldowns if the Corrupted Totems aren’t killed quickly.

Ursoc
Save large healing cooldowns for later in the fight and don’t be afraid to use your tank mitigation cooldowns (e.g., Ironbark). Tank healing will be really heavy as the fight progresses. Run out of the group when the target of Focused Gaze. Switch places with the other group after the Momentum is soaked.

Notable Trash  before Il’gynoth: Don’t step in the purple fog. Run out of devastating stomp from the Ancients. Stand away from Bo’lan and heal the active tank.

Il’gynoth
Dispel Touch of Corruption if your compatriots are the targets of the Nightmare Ichors. Move away from the group if the target of Spew Corruption. Once the Nightmare Ichors are ready to be pulled in run toward the Eye of Il’gynoth. You’ll want to use personal cooldowns while in the clump due to the Nightmare Explosion and Touch of Corruption damage. Watch out for Ground Slam from the Dominator Tentacles. Spread out to try to avoid hitting other raid members with the Eye of Fate. A priest’s mass dispel comes in really handy when the Nightmare Ichors are pulled next to the Eye of Il’gynoth.

Notable Trash before Renferal: Kill the Screeching add 1st. Stand away from the Spider miniboss. Tanks will need extra healing with the Roc miniboss.

Elerethe Renferal
Spot healing will be needed on the members connected by Web of Pain. Use healing cooldowns on the tank on add duty during Vile Ambush. Get as far away from the damage circle for Vile Ambush. Run out of the group to drop necrotic venom (use baby steps to spread them out in a tight area). Try to run over the Necrotic venom pools if the target of twisting shadows. Put your back to a wall during Gathering Shadows and use a healing cooldown if possible. Pick up a feather and aim for spiders on the next platform (it’s a shorter flight than expected). Avoid the tornadoes.

Notable Trash before Dragons: Dispel poison stacks. Spread out and way from the damage. Don’t stand in anything.

Dragons of Nightmare
Ysondre: Don’t stand near blast. Dispel the vines targets.
Emeriss: Interrupt rotation or AoE healing needed. Move out of the group if the target of infection.
Lethon: Spread 10 yrds for projectiles. Help kill Shades if possible.
Taerar: Don’t stand in the sleep fog. Use tank cooldowns.

Notable Trash before Cenarius: Move out of darkfall. Stack on the Burst target.

Cenarius
Kite the Nitemare Brambles if you are the target of the brambles. Move with the group to stand near the target for the Cleansing by Malfurion. Stack with melee to share the damage from Desiccating Stomp by the Ancient Nightmare. A tank healing cooldown rotation will help mitigate the Spear of Nightmares damage and hence the size of the Nightmares pool.

Notable Trash before Xavius: Don’t stand in Crushing Darnkness. Spread out for Hateful Rebuke missiles. Extra healing will be needed for Nightmare Bolt targets.

Xavius
Manage your corruption by avoiding the adds, kiting the Lurking Eruptions, avoid the Nightmare blades, and try to limit the Corruption Meteors you soak. Use tank healing cooldowns if needed on the active tank for Darkening Soul. Don’t be afraid to use cooldowns while in the Dream and then once you come out.  Soak Discharge pools if needed. Run together with Bonds of Terror. Manage the dispels of Blackening Soul on the tank. Remember you only have 4 dispels before you reach 100 Corruption while in the Dream. Help kill the Nightmare Tentacles.

Eye of Azshara Healing 101

loadscreen_nagadungeon_1
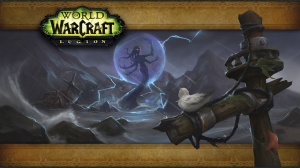
The first of the Legion Healing 101 dungeon guides covers one of the early dungeons available right at the start of the leveling experience and can be accessed at level 98. Eye of Azshara is located in eastern Azsuna as the culmination dungeon for that zone. As with my Draenor dungeon guides, the gear called out after each boss are limited to pieces of particular note from all of the drops in this dungeon. Also, any mechanical differences between difficulties will be called out separately for each fight in the guide.

The following achievements will need to be completed on Mythic difficulty toward your Glory of the Legion Hero meta achievement: But You Say He’s Just a Friend,  Ready for Raiding V, and  Stay Salty.

The following professions and class quests send you to this dungeon:
Alchemy: Put a Cork in It
Leatherworking: Scales of the Sea
Skinning: The Scales of Serpentrix
Tailoring: The Depraved Nightfallen
Death Knight: The Frozen Soul
Druid: Cleansing the Dreamway & Essence of Balance
Mage: A Magical Affliction
Priest: Looking Through the Lens
Shaman: The Scepter of Storms

Due to a mechanic that shows up after defeating two bosses called Violent Winds, I’ve included the fights in the typical/recommended boss order below.

Warlord Parjesh
The Warlord Parjesh fight is primarly an add fight and most of the damage in the fight is single-target and spiky. Throughout the fight Parjesh will Call Reinforcements in the form of either a Hatecoil Crestrider or a Hatecoil Shellbreaker. The Crestriders should be interrupted to prevent Restoration which heals Parjesh. After the second and third Call Reinforcements, Parjesh will target a player with Impaling Spear. If an add is still alive when this is cast, you should move so that the spear strikes the add first as it will do significant damage to the add. Parjesh will periodically target a random player with Throw Spear. The targeted player will need some additional healing as it deals a moderate DoT. Finally, tanks should keep Parjesh facing away from any ranged players so that Crashing Wave will not be aimed toward them and at 30% health, he will Enrage causing more frequent melee auto-attacks that may need additional healing.

Heroic: On Heroic and Mythic difficulties, Parjesh’s Call Reinforcements summons both a Crestrider and a Shellbreaker, instead of just one. The party will need to focus down the Crestrider, to remove the healer, and use the Impaling Spear to finish off the Shellbreaker. Parjesh’s Crashing Wave will leave behind pools of Quicksand in his wake.

Quick Tactics: Aim Impaling Spear through an add if possible. Extra heals for Throw Spear target and tank at end.

Gear
Hatecoil Commander’s Amulet – +Haste/Mastery Neck

Notable Trash: Lady Hatecoil is protected by Arcane Shielding, making her invulnerable to damage until the four Hatecoil Arcanists that are along the path leading to the beach. To be able to engage Lady Hatecoil, two of the four Arcanists must be taken out.

Lady Hatecoil
The main Lady Hatecoil encounter is a movement specific fight with mostly single-target mechanics. The movement specifics center around alternating Static Nova and Focused Lightning abilities of Lady Hatecoil. Lady Hatecoil will start with Static Nova which will stun players unless they stand on the sand islands in the pool. She will follow this ability with Focused Lightning which will do damage in a small AoE zone including to any sand islands nearby so players will want to be moved off the sand islands for this ability. Throughout the fight she will cast Beckon Storm, spawning a Saltsea Globule near each player. Kite the Globule to the tank if you generate threat on them. Finally, Lady Hatecoil will occasionally debuff players with  Curse of the Witch. Turn away from other players when Curse of the Witch is about to expire to avoid knocking them back.

Heroic: On Heroic and Mythic difficulty, Lady Hatecoil will gain the ability Monsoon. The Monsoon is a small tornado that will follow the nearest party member. If you’re targeted by Monsoon kite it away from the Sand Dunes, or over a distant Sand Dune to despawn the monsoon, but beware it also destroys the sand dune.

Quick Tactics: Stand on the dunes for Static Nova and move into the water for Focused Lightning.

Gear
Gift of the Ocean Empress – Holy Artifact Relic
Seal of the Nazjatar Empire – +Crit/Haste Ring
Stormsinger Fulmination Charge – +Int & +Mastery Trinket

Notable Trash: There are five types of trash mobs around Serpentrix: packs of Seaspray Crabs, Mak’rana Hardshell, Mak’rana Siltwalker, Stormwake Hydra, and Cove Seagulls. You’ll want to clear out as much of this trash as you can in preparation for the Serpentrix fight.

Serpentrix
Serpentrix is a two-phase fight that cycles between the boss and a multi-target spread phase. During the first phase, the party fights only Serpentrix’s main head (the green one). Serpentrix will use two abilities during this phase, Poison Spit and Toxic Wound. Poison Spit is a targeted green swirl that will be somewhat complex to avoid due to Violent Winds. Toxic Wound lasts for 6 seconds, and causes the target to drop a Toxic Puddle at their feet every second. Quickly kite the puddles in a tight arc.

When Serpentrix reaches 66% health and again at 33% health he will submerge and reappear at another sinkhole in the encounter area. When Serpentrix re-emerges, two red Blazing Hydra Spawn heads will also emerge from random sinkholes. These Blazing Hydra Spawns deal party-wide AoE with Blazing Nova. The DPS should focus down the Blazing Hydra heads quickly and interrupt the Blazing Nova. If your team is short on interrupts the AoE in the fight will require healing cooldowns. Serpentrix will continue with the poison and toxins so keep moving. Furthermore, if there are no targets within melee range of him, Serpentrix will cast Rampage, increasing the rate of Poison Spit. I’ve had a lot of success with keeping the tank on Serpentrix while the dps deal with the Blazing Hydra adds, but your group may find alternative strategies. Once both Blazing Hydra heads are dead, the fight returns to the simpler main phase.

Heroic: On Heroic and Mythic difficulties, when Serpentrix Submerges, an Arcane Hydra Spawn appears in place of one of the Blazing Hydra Spawn mobs. Arcane Hydra Spawn repeatedly casts Arcane Blast, dealing light Arcane damage to a randomly-selected player.

Quick Tactics: Avoid all the stuff on the ground. Use healing cooldowns during the add phase as needed.

Gear
Serpentrix’s Guile – Shadow Artifact Relic

Notable Trash: The pack of trash right before Deepbeard’s cove, contains one of each of a Skrog Wavecrasher and Skrog Tidestomper. The Skrog Wavecrasher will cast Rising Fury every 18 seconds and the Skrog Tidestomper will cast Massive Quake every 20 seconds. Rising Fury can do a stun and Massive Quake will require frequent movement.

King Deepbeard
The King Deepbeard fight is a single-target fight with lots of movement. Deepbeard begins the fight at 30 Energy, and gains 5 Energy per second. When he reaches full Energy, he will cast Quake under each player. Aftershock will follow at each Quake location approximately 4 seconds later. The party should spread out more than 5 yards apart to avoid taking extra Quake damage from their allies. Shortly after the first  Quake, and again every 30 seconds, Deepbeard will Call the Seas. Call the Seas summons a large number of rapidly moving pools of water throughout the encounter area. Due to the number of pools, and the speed with which they move, it is impractical to avoid all of them so just try to avoid standing in them for any length of time. Finally, Deepbeard will cast Gaseous Bubbles around two randomly-chosen non-tank players shortly after the first Quake, and again every 33 seconds. If you are affected by Gaseous Bubbles, you must purposefully take damage in order to break through the shield and prevent Gaseous Explosion which does a significant amount of AoE damage. When King Deepbeard reaches 30% health, he will  Frenzy, increasing his attack speed by 100%. This results in extremely heavy tank damage, and both the tank and healer should use cooldowns to ensure the tank survives.

Heroic: On Heroic and Mythic difficulties, the damage dealt by Gaseous Explosion is proportional to the amount of damage absorption left on the Gaseous Bubbles when it expires. If your party handles this mechanic properly, using the Quake/ Aftershock or the Lightning Strike to take damage, the Gaseous Explosion should never occur.

On Mythic and Mythic+ difficulties, the Aftershock patches that form after Quake is cast do not disappear after Aftershock is triggered. Each time King Deepbeard casts Quake, all existing Aftershock patches will deal their Aftershock damage. Players should strategically place the Quake to ensure they will not be standing in any of the Aftershock patches in the 4 seconds following a Quake.

Quick Tactics: Avoid Quake and the aftershocks unless you have a Gaseous Bubble. Use your cooldowns at the end when Frenzy occurs.

Gear
Heart of the Sea – Frost Artifact Relic
Mainsail Cloak – +Versa/Mastery Cloak
Braided Silver Ring – +Versa/Mastery Ring

Notable Trash: Players must defeat the four Naga summoners surrounding the Wrath of Azshara before they can engage the boss directly. Each of the Naga will cast Lightning Blast and Arcane Bomb along with a third ability that will be familiar from the Naga trash at the start of the dungeon.

Wrath of Azshara
The Wrath of Azshara encounter is entirely single-target fight with significant environmental effects requiring high movement. Due to the heavy-movement nature of the fight, it is important for players all to stay within range of the healer. Note that melee can attack from the boss’s side to improve line of sight and range issues. A lot of the movement is in avoiding the environmental effects which include Tidal Wave and Mystic Tornado. Tidal Wave sweeps around the island surrounding Azshara doing moderate frost damage to players who pass through it. Mystic Tornado spawns near a random player and will swirl in the general area of the spawn point causing moderate damage and launching players struck into the air. These effects are summoned periodically throughout the fight and never despawn, so it becomes increasing difficult to avoid all of these effects.

Additionally, the Wrath of Azshara will occasionally target a random non-tank player with Arcane Bomb. The targeted player should move to the edge of the island to be dispelled and then move out of the AoE effect. The tank will also be targeted by Massive Deluge which is a heavy Frost AoE that can knock you away from the boss. If you move out of melee range you can trigger Raging Storms, a massive stacking AoE. Finally, there is a single source of unavoidable AoE damage called Heaving Sands that you’ll need to keep the party topped up with all of the other effects in the fight. This also will include the tank resulting in heavy to moderate tank damage throughout the fight.

At 10% health remaining, Wrath of Azshara casts Cry of Wrath increasing the spawn of the environmental effects including Lightning strikes.

Heroic: On Heroic and Mythic difficulties, Wrath of Azshara gains an additional ability called Crushing Depths. Crushing Depths will target a random party member (not the tank) marking a large AoE zone around them dealing heavy damage that will need to be split amongst the dps and healer. This mechanic is easiest to manage if the healer is marked and the group stays within 12 yards of the marked player. Additionally, on these difficulties, players who are struck by a Tidal Wave or a Mystic Tornado receive stacking debuffs reducing movement speed and increasing nature damage taken.

Quick Tactics: Get out of the storm. Dispel Arcane Bomb and use your cooldowns for Cry of Wrath damage.

Gear
Bottled Hurricane – +Haste Trinket
Pact of Vengeful Service – Life Artifact Relic
Rage of the Tides – Frost Artifact Relic
Band of Fused Coral – +Haste/Crit Ring

Healing WoW: Broken Leveling

Welcome to my first “newsy” post for Legion, aka a “Healing WoW” post. By now you should have broken into the Broken Isles questing. I’ve started off with my druid and am well into questing in my third zone. However, I do have quite the bevy of alts waiting in the wings thanks to the Invasions this past week. In fact, I even leveled a baby mage up to 60 for my “boost” toon on one of my accounts (yes, I have 2) so that I could jump start her professions.

Based on my Beta exploration and testing, I decided to start out my primary character in Highmountain, for a couple of reasons: 1) I felt that the leveling was more concentrated in pockets than some of the other zones and 2) to avoid the big crush of Aszara as a “starting” zone, and 3) my druid is a tauren and I had to give her a little tauren love.

I leave you to enjoy your leveling with a lovely screenshot from a “hidden” treasure atop a hill in Azsuna:

Screenshot of Azsuna from mountaintop.

Happy Healing!

Pre-Expansion Welcome

ImBackCasual readers may have noticed that I took a very long sporadic hiatus from my blog. The Real Life boss caused a pretty serious wipe and getting back to a point in which I could post regularly was pretty rough. Well… I’m Back!

I’ve finished up the Dungeon Healing 101 entries from the last of Warlords of Draenor and as with many of you readers I’m ready to jump into the Legion content. I’ve been enjoying the Invasions and with 1 week left until the expansion is released I’m excited and ready to begin. I’ll be keeping up with the Tuesday posts right through Legion and hopefully you’ll enjoy the content I have planned. Feel free to send me a twitter message or email at greenbarspec at gmail dot com.

Shadowmoon Burial Grounds Healing 101

300px-Shadowmoon_Burial_Grounds_loading_screen
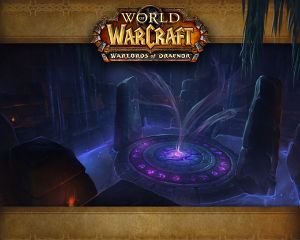
This final Warlords of Draenor Healing 101 WoW dungeon guide covers a level 100 dungeon. Shadowmoon Burial Grounds is located in the center of Shadowmoon Valley and has both a Normal-difficulty and a Heroic-difficulty version of the dungeon. There are four bosses in this dungeon but minimal trash packs. There are a few mechanical differences between Normal and Heroic modes that will be called out for each fight in the guide below. One difference in my Draenor guides from previous guides is that the gear called out after each boss are limited to pieces of particular note from among all of the drops in this dungeon.

There are three achievements to complete in this Heroic dungeon that count toward the meta-Achievement: What’s Your Sign?,  Icky Ichors, and  Souls of the Lost.

Sadana Bloodfury
Sadana Bloodfury is a two ‘phase’ fight that cycles between the two phases. She starts out in the center of a circular platform ringed with purple runes, which if you step on during the encounter can do a significant amount of damage. The first ability to watch out for is Daggerfall, which is a targeted small AoE effect we’ve seen in Wrath dungeons; just move out from under the falling dagger. Secondly, she has an ability called Dark Communion, which summons a Defiled Spirit add that rushes toward Sadana. If the Defiled Spirit reaches her, she heals and gains a damage buff, so assisting your party with stuns and slows (druids you’ll not be able to use roots) can really help. The second ‘phase’ is called Dark Eclipse, in which she corrupts the runes on the floor and does a high damage AoE. You’ll want to run to the circle of moon runes to gain a Lunar Purity buff during this ‘phase’.

Quick Tactics: Don’t stand under the dagger. Stand on the moon rune during Dark Eclipse and help to kill/slow the Spirit add.

Gear
Sadana’s Grisly Visage – +Crit/Haste Offhand
Necks and Capes drop from this boss.

Notable Trash: Leading up to and within Nhallish’s encounter area, there are a large number of very faint ghostly barrows. Stepping on or near these barrows releases Exhumed Spirits. Some tanks will clear the barrows on the way to the next boss, but if not be prepared for some unexpected adds when members of your party accidentally step on a barrow.

Nhallish
Nhallish is another repeating two-phase encounter. During the first phase you’ll want to watch out for the Void Devastation pools and use your AoE healing CDs for Void Vortex as it tries to suck you in. The second phase occurs during Soul Shred, in which players will be transported to a void realm and must recapture their soul by defeating a Possessed Soul and looting the corpse. Each player will need to quickly defeat their own soul to gain the Returned Soul buff. Healers, your Holy and Nature damage will be a little extra powerful so you shouldn’t have too much difficulty.

Quick Tactics: Don’t stand on or in any purple stuff on the ground. Quickly kill your Soul add and click the portal.

Gear
Chests drop for Druid, Paladin, and Shaman and Bracers drop for Paladin, Priest, and Shaman.

Notable Trash: Plagued Bats do a nasty little disease debuff called Plague Spit that stacks up to 5 times. Monks, Paladins, and Priests you’ll want to dispel as quickly as possible. Druids and Shamans you’ll probably need to pull out your tank cooldowns.

Bonemaw
Bonemaw despite the name has no relation to the ICC boss and instead resembles a worm from Dune. There are three main mechanics to this fight that require a little coordination otherwise it’s just an execution fight. First, Body Slam will target a cone area of the platform that you’ll want to move out of to avoid getting knocked off the platform and into the water. If you do get hit, there are water jets near the bridge to his platform. Secondly, he will spit out Necrotic Pitch pools through out the fight that will target a ranged player. You’ll want to place them carefully in preparation for Inhale. During Inhale, Bonemaw will begin to suck players toward him, heavily damaging or outright killing any players captured. You can resist this suction by standing in the Necrotic Pitch pools. Finally, throughout the fight he will dive into the water and resurface at a different location on the platform.

Heroic: After the first Inhale, the two Worms you fought on the bridge will join the fight, appearing on either side of the platform. These worms have the Body Slam and spit abilities that the boss has, so you’ll have the damage coming from multiple directions. Make sure a melee player is nearby each of the worms to avoid extra damaging attacks.

Quick Tactics: Avoid the Body Slam cone effect. Stand in Necrotic Pitch during Inhale to avoid the suction.

Gear
Waists drop for everyone and Hands drop for Monks and Priests.

Ner’zhul
The Ner’zhul fight is mostly a straightforward fight with three key abilities to negotiate. First, Omen of Death similar to the Daggerfall ability from the first boss, will cause continues AoE damage in an area surrounding it. Secondly, the tank should point Ner’zhul away from the party due to his cone ability called Malevolence. It stretches the radius of the platform so you’ll want to be aware of the direction he’s facing at all times. Finally, Ner’zhul summons a Ritual of Bones in the form of a wall of shadowy skeletons from one of the four cardinal directions (N, S, W, or E). A member of the party should be designated to pick the target to focus damage on, clearing a space in the advancing wall of shadow skeletons and allowing the party to pass through. There is minimal damage so as a healer you should assist the party during this phase.

Quick Tactics: Don’t stand in it. Kill the shadowy skeleton target and move through the space in the wall.

Gear
Portal-Ripper’s Staff – +Crit/Haste Staff
Boots, Rings and Helms drop for everyone.

Grimrail Depot Healing 101

Grimrail Depot Loading Screen
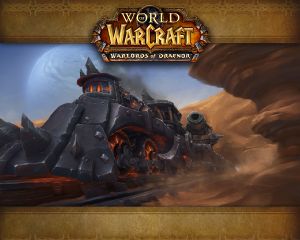
This next Warlords of Draenor Healing 101 WoW dungeon guide covers the first level 100 dungeon for this expansion. This is probably my least-favorite dungeon of this expansion so my personal comments will probably be more pessimistic than usual. Grimrail Depot is located in the northern part of Gorgrond and has both a Normal-difficulty and a Heroic-difficulty version of the dungeon. There are only three bosses in this dungeon and minimal but hard-hitting trash packs. There are a few mechanical differences between Normal and Heroic modes that will be called out for each fight in the guide below. One difference in my Draenor guides from previous guides is that the gear called out after each boss are limited to pieces of particular note from among all of the drops in this dungeon.

There are two achievements to complete in this Heroic dungeon that count toward the meta-Achievement: This is Why We Can’t Have Nice Things and No Ticket. Also, players that were working on the legendary ring quest-line needed to remember to pick up their Core of Iron.

Railmaster Rocketspark
Railmaster Rocketspark is accompanied by Borka the Brute in this first encounter. The fight will start off with Rocketspark flying around the room, launching VX18-B Target Eliminator missiles at two random targets. You’ll need to continually step out of the red targeting circle to avoid the damage from the missles. Meanwhile, Borka will be Slam-ing the floor in front of him, doing a decent amount of damage to your tank. Throughout the fight, Rocketspark will rise up into the air and channel a stream of X21-01A Missile Barrage. The tank should point Borka at Rocketspark such that Mad Dash knocks him down, so you’ll want to move out of the way. If for some reason, Rocketspark dies before Borka you’ll need to use all of your cooldowns to keep the tank alive through Unmanaged Aggression.

Heroic: Slam will also disrupt spellcasting, so watch for the effect from Borka.

Quick Tactics: Don’t stand in Missile targeting circles. Use cooldowns on the tank if Rocketspark dies first and AoE heals if Borka dies first.

Gear
Rings drop for Druid, Priest, Shaman and Waists for Druid, Priest, Shaman.

Nitrogg Thundertower
The Nitrogg Thundertower encounter starts out in a small space at the front of a train car, and begins as fairly straight-forward tank-and-spank encounter. The two main abilities you’ll want to avoid are Blackrock Mortar and Blackrock Grenade, that are basically straight-forward fire damage. At 60% health is when Nitrogg gets into his Assult Cannon and the fun begins. Throughout this phase of the fight he will call reinforcements that the DPS will need to be dealing with. They should be prioritizing the reinforcements as Boomers > Grenadier > Infantry. You can help out the party by placing DoTs or otherwise attack the Assault Cannon between waves of reinforcements. The key to the fight is to loot the Boomer’s body to gain a Blackrock Mortar Shell, as about three of them when used in the Turrets should be enough to take out the Assault Cannon. He will also target players with Suppressive Fire, which you’ll want to break line of sight for by ducking behind a pillar or a large stack of crates. Once the Assault Cannon has been destroyed, Nitrogg again joins the fight and the party can finish him off.

Heroic: Nitrogg’s Assault Cannon gains Slag Blast, which will cover a section of the train car in fire. You will also gain an additional reinforcement, Gunner. Gunners drop Shrapnel which can be used in the Turrets to quickly kill adds.

Quick Tactics: Line-of-sight the Suppressive Fire and assist with DoTs on the Assault Cannon. Don’t stand in Fire!

Gear
Chests drop for Druids and Shaman and Necks for Druids, Priests, and Shaman.

Skylord Tovra
Skylord Torva is mostly a “don’t stand in it” fight for the healer. Torva throws out Freezing Snares which will do moderate damage and root you in place. Secondly, she does a Spinning Spear effect that do targeted whirlwind type damage. She is accompanied by Rakun whom flies overhead and casts Thunderous Breath periodically creating Diffused Energy over a portion of the rail car.

Heroic: In heroic, Tovra will now target random players with Hunter’s Mark, after 6-seconds, she will then launch an Explosive Spear at the player’s location. Move around to avoid dropping the Spear on your party.

Quick Tactics: Don’t stand in the bad stuff.

Gear
Torva’s Lightning Repository – +Int/Mastery Trinket
There is also a weapon that might be useful for healers is you still need an upgrade.
Gloves drop for Priest, Druid, Monk, Shaman; Legs drop for Paladin and Priest; and Bracers drop for Priests.

Upper Blackrock Spire Healing 101

Upper_Blackrock_Spire_loading_screenThis next Warlords of Draenor Healing 101 WoW dungeon guide covers the first level 100 dungeon. Upper Blackrock Spire is located in Blackrock Mountain in Burning Steppes (Eastern Kingdoms) and has both a Normal-difficulty and a Heroic-difficulty version of the dungeon. There are five bosses in this dungeon with some complex trash packs and routes. There are a few mechanical differences between Normal and Heroic modes that will be called out for each fight in the guide below. One difference in my Draenor guides from previous guides is that the gear called out after each boss are limited to pieces of particular note from among all of the drops in this dungeon.

There are four achievements to complete in this Heroic dungeon that count toward the meta-Achievement. The first three include:
Bridge Over Troubled Fire, Magnets, How Do They Work?, and Dragonmaw? More Like Dragonfall!. This instance is of particular note due to it’s relevance to Leroy Jenkins fans; in fact, you can pick up the Jenkins title here by completing Leeeeeeeeeeeeeroy…? (also needed for the meta-Achievement).

Notable Trash:
The entrance of this instance begins by taking out the trash packs located in the alcoves around the room, each containing a rune that must be deactivated. The runes are deactivated by killing trash, so none of these packs can be skipped. The trash packs can consist of a combination of the following: Black Iron Grunt, Black Iron Berserker, Black Iron Leadbelcher, and Ragemaw Worgs. Kill order should be Leadbelchers > Warcasters > Grunts > Berserkers & Worgs. Leadbelchers will activate the cannons outside of the alcoves, which can lay down some heavy AoE if not taken out first.

Orebender Gor’ashan
Gor’ashan is located up on top of a platform surrounded by Rune Conduits. Deactivate the Rune Conduits to start the boss fight.  Players should stack on the platform or the ramp leading up to the boss to avoid Lodestone Spike. Throughout the fight Gor’ashan will randomly activate the Rune Conduits to empower himself and lightning. One of the DPS should jump down from the platform, avoid the Electrical AoE and click on the Rune Conduits to deactivate them. The Electrical Pulse AoE moves very quickly and can easily be a one shot on low geared players if they move slowly or don’t get out of the pulse. Healers should be ready to use cooldowns and extra heals on the Conduit player.

Quick Tactics: Stand on the platform with the group and adjust your position to keep your Conduit deactivator topped off.

Gear
Boots for Shaman and Druids and your Cloaks drop here.

Kyrak
Kyrak is the main boss and is accompanied by two Drakonid Monstrosities. The two Monstrosities should be killed first and then on to the boss. Throughout the fight Kyrak will target players with Vileblood Serum; move out of these pools. He will target a random player with Dibilitating Fixation which should be interrupted by your dps and tank. At 50% health he will begin using Rejuvenating Serum to heal himself. Priests and Shaman should be using offensive dispels when possible. The damage in this fight is front loaded so use more cooldowns at the beginning and add in dps as the damage tapers off.

Heroic: Kyrak also targets a random player with Salve of Toxic Fumes, move away from your party members. It is a poison effect and can be removed.

Quick Tactics: Use cooldowns early as needed and don’t stand in poison.

Gear
Finkle’s Flenser – +Crit/Mastery Dagger
Paladins, Shamans, and Druids will find some Nice Shoulders and of course your Rings drop here.

Lanticore (Heroic Only Rare Boss)
This rare boss is only available in Heroic Mode and would be located near Kyrak in the old Rookery when he’s present. Drops the Lanticore Spawnling pet if you see him. The tactics suggest that you can just heal the tank through the melee damage.

Commander Tharbek
The Commander Tharbek encounter starts right after a trash gauntlet. The trash gauntlet consists of three waves that begin right after approaching the gate at the far end of the room. Each wave consists of various combinations of Leadbelchers, Summoners, Dreadweavers, Engineers, Berserkers & Worgs and all of the waves will be accompanied by Vilemaw Hatchinglings that fly around and spit poison at everyone. The ranged DPS should be handling the Hatchlings and concentrating on the Summoners and Leadbelchers, interrupting as many abilities as possible.

Once the trash waves are cleared, Commander Tharbek makes his appearance riding his Ironbarb Skyreaver. Commander Tharbek is primarly a single phase fight with lots of extraneous damage and a charge ability called Iron Reaver. When Commander Tharbek reaches approximately 50% health, an old friend, Awbee will join the fight. Awbee doesn’t do a lot of damage but can add that last little bit to get him down. Throughout the fight you’ll want to avoid the Imbued Iron Axes (spinning around the room), Noxious Spit puddles, and Incinerating Breath.

Heroic: On Heroic difficulty, Commander Tharbek will dismount from his Skyreaver at around 50%, and you’ll need the extra cooldowns to bring down the skyreaver as well.

Quick Tactics: Avoid standing in any of the extraneous damage and keep heals rolling on your tank and the Iron Reaver target.

Gear
Tharbek’s Lucky Pebble – Spirit + Mastery (Use) Trinket
Gloves for Priests and Paladins and Chest for Druid, Monk and Shaman can be found here.

Son of the Beast (Optional Boss)
Son of the Beast is a reference to the old instance boss The Beast. He does Fiery Charge which if you encountered his father, you’ll remember the knockback. This is accompanied by Fiery Trail that is left behind in his path. Additionally, he will use Terrifying Roar to disrupt the melee pile.

Ragewing the Untamed
Ragewing the Untamed appears from below as your party steps onto the bridge toward the Spire Throne. His fight is basically composed of two phases. During the first phase, Ragewing will target ranged DPS and healers with Magma Spit that you’ll need to place strategically as it will remain on the ground fro a period of time. This is important because Ragewing will also sweep Engulfing Fire from one of the bridge to the other. The flames will disorient and deal heavy damage to any player caught in the path. Players should run to one or the other end of the bridge away from his starting point to avoid the flames (e.g., if Ragewing faces the far end of the bridge, you’ll want to stay near the Furnace end of the bridge). At 70% and again at 40% health, Ragewing will fly above the bridge for phase 2. During phase 2, Ragewing will target the bridge with Fire Storm and Ragewing Whelps will attack the party. After the 40% health phase, Ragewing will land on the bridge and gains Burning Rage. This is an enrage effect and can be soothed or dispelled.

Quick Tactics: Don’t stand in fire. Hug your tank during phase 2 to keep the whelps off you.

Gear
Neck pieces and Legs for Priests, Paladins, and Druids can be found here.

Warlord Zaela
Zaela, the final boss of the encounter requires strategic placement and burst dps. The first ability to watch for from Zaela is Black Iron Cyclone, a whirlwind fixate. You should kite her away from the party when targeted. At 60% health, she flies away on her drake and Black Iron Wyrm Riders land on the platform. They can cast Chain Pull which will yank you into the melee pile.  Throughout this phase, Emberscale Ironflight drakes will hover at the outskirts of the platform and cast Burning Breath. Burning Breath will cover the third of the platform that the drake is facing. You can watch the drakes as they swoop down to predict which area to avoid. After about 40 seconds, Zaela will return to the platform and resume the first phase. The Emberscale drakes will continue targeting the platform for the rest of the encounter.

Quick Tactics: Stand toward the center of the platform to be able to avoid the Burning Breath. Avoid the whirlwind fixate damage.

Gear
Waist for Priest, Druid, and Shaman, and Wrist for Monk and Paladin, and Helm for Paladin can be found here.