Vuhdo Guide: Part 2

Spells Tab
This tab provides the configuration for your keybindings, which is one of the key components of a healing addon. Now you’ll be really getting into the meat of the configuration which might slow you down.

Mouse
Spells (Mouse)

Quick: Follow the advanced set-up if you plan to heal using mouseover target or click-cast healing.
Advanced Set-up: I’ve mentioned before my preference for click-cast healing or mouseover macro healing, here is where you configure the nuts-and-bolts for that interaction.

The rule people try to follow is left click is your most used spell and right click is your second most used spell. Then continue through your healing spells using Modifier Keys. The image shows a sample of what that looks like for Shift-Left Click etc. You can assign any spell or action, including custom macros. Don’t forget to put in special key words too, such as target, menu, tell, and assist.

Note that if you have any custom macros that are named the same as the spell name, Vuhdo will use the macro over the spell. This is a common source of confusion as people are trying to assign spells to the mouse buttons and are forgetting they have at some point made macros with the same name. The right side of the input field will need to say “spell” if you’re assigning a spell and “macro” if assigning a macro.

Keys Local
Spells (Keys Local)

Quick: Leave these options alone.
Advanced Set-up: I personally do not use this section, but you would normally use this section to create local “macros” that interact only with the Vuhdo frames. Enter a macro name, edit it to enter the macro, then assign a keybind to this macro.

Keys Global
Spells (Keys Global)

Quick: Follow the advanced set-up only if you are using keybindings instead of mouseover/click target healing.
Advanced Set-up: This section essential creates a set of simplistic macros stored internally within VuhDo (they don’t use a blizzard macro menu slot). Similar to the Mouse section, you assign a spell name to a numbered slot. However, you cannot assign macro names here as VuhDo is already using these in macros and you can’t link a macro within another macro. These macros should work over all frames, whether vuhdo or not.

After you type in spell names you want to assign, go into the WoW Key Binding menu and set up the key bindings for each of these newly made macros. In the WoW keybinding menu, the Keybind Spell 1 in VuhDo raid frames section corresponds to the Key Bindings spell 1 in VuhDo. The numbers in the Key Bindings panel are not referencing keyboard keys, but a instead referencing the VuhDo section in the WoW keybinding menu.

If however, you like your macros to do very specific things, you like modifiers and spell combos etc., you can either make the macros yourself in the default WoW macro  menu, and bind to the mouse buttons or drag them to the action bars and use as any regular mouseover macros or you can use the Keys Local section of VuhDo.

Misc
Spells (Misc)

Quick: Leave these options alone.
Advanced Set-up: This section provides options for set-up of auto-triggering of any trinket or spell that doesn’t trigger the global cooldown. This will allow it to be used every time it is off cool down. Error sound and message suppression is built in as well so you don’t have to write out your own macros for this. In Miscellaneous, you can also set VuhDo to auto target whoever you are mousing over and healing currently by enabling Target. Enabling Keep Stance will allow you to switch back to Moonkin form if you quickly need to cast a heal. Stop Cast is a feature to create the Stop Cast rhythm that many long time healers used frequently in Vanilla and BC.

Hostile
Spells (Hostile)

Quick: Follow the advanced set-up if you plan to heal using mouseover target or click-cast healing and you play a Discipline Priest, Paladin, and/or a Shaman with Telluric Currents.
Advanced Set-up: This section works similarly to Mouse but this applies to hostile targets. If you do NOT set-up to show targets or target of targets in Part 4 – Panels, then this section will not be useful to you. Clicking on hostile units directly will follow these mouse assignments.

If you are ever assigning a macro instead of a spell into any of the mouse button assignments under Spells (Mouse) and then you want to assign either a macro or a spell to the same mouse button here (and vice versa), you may have problems with spells not firing, spells firing only on certain targets, only on yourself etc. You will instead have to create your macro so that includes both the heal and the hostile action and assign it to both friendly and hostile sections. If you are referencing spells directly for both friendly and hostile assignment for that button, you do not need to follow this process.

Smart Cast
Spells (Smart Cast)

Quick: Select a Modifier Key if you are playing a Druid (or a DK) so that you don’t use your Battle Rez at inopportune times.
Advanced Set-up: In this section you can set certain actions to smartcast when clicking on the unit. However, these features really shine when paired with some of the features in Part 3: Buffs and Debuffs. Battle Rez can be set to smart cast in combat when clicking on the dead player’s bar while in combat. Most of these will be enabled by default, which as a raider may pose a problem when you are working on progression and don’t want to accidentally battle rez a downed player. In that case, set the Modifier Keys you would like this to work with here so that you still have the functionality but do not have to use it if you simply want to target someone or heal out of combat (or in combat in case of battle rez).

VuhDo Guide: Part 1

General Tab
The general tab covers configuration options that will usually effect all of your panels.

General
General (General)

Quick: The important options here are to display the 5 man MTs when in LFG so that you can figure out who is your tank (e.g., the warrior or the dk?). The ability to hide empty panels, or even hide VuhDo when you are soloing. Finally, you will be interested in locking your panels so that you can’t move them around your screen.
Advanced Set-up: Operation Mode can usually be left alone, but if you are interested in more advanced Health remainder configuration you would look here. Additional operation modes in essence fade out most of the bars except a few that are showing the lowest HP, allowing to isolate more effectively those in most need of healing. The bars can be selected based on a few similar criteria: most HP lost, least HP left, or health percentage left. You can set both the irrelevancy limit above which the bars are faded out as well as max number of players that are to be considered relevant at any given time. Filter allows you to filter out various units from your main VuhDo panel if you’re showing them in separate panels like main tanks or private tanks panels, to avoid redundancy. Hide Panels will hide entire panels when they are empty. If you want to hide specific units within a single group when you only have two people in it, goto Panels (General) Ordering-Hide empty. Lock Panels is highly recommended once you’re done fiddling with the settings. Accidentally dragging the panels during a fight can lag you out for a few seconds and send your raid window off somewhere into a corner. You have the option to lock them only during the fight if you prefer to fiddle still with the positioning between the pulls.

Scanners
General (Scanners)

Quick: Leave these options alone.
Advanced Set-up: Under Range, you will want to choose the spell with the shortest range, so that you can see at a glance who is not in range of your heals because they will be faded out. You can set options to also see the distance shown as a number. You can make the arrow less or more intrusive (adjust size, appear only on dead players or always appear on target regardless of range). Note that these distances are approximated from map coordinates and require some major calculations on the part of Vuhdo. If you’re playing on a laptop and are struggling with your FPS, turning this off would be one of the first things to do if you’re trimming vuhdo down. Global Scanners covers update frequency and range for hots/debuffs/effects etc. Talent Trees option enables you to improve accuracy of raid role assignment. It will help with wrong assignments in classes like druids or dks for example. Enabling Parse under Combat Log is an internal vuhdo function for parsing combat log in order to provide smoother and faster health updates.

Threat/Incoming
General (Threats)

Quick: Leave these options alone.
Advanced Set-up: Incoming Heals are important to monitor as a healer, so unless you have serious performance issues you should have those turned on. Under Check for Aggo, Tank Mode will only watch the aggro for threat detection and ignore enemies occasionally targeting players (such as caster mobs). When you’re tanking, you don’t want to be seeing raid members getting aggro from a random cast and wasting time trying to taunt the mob off of them when the mob can’t be tanked. The Text option will mark a player getting aggro with brackets or symbols, which is nice for having a quick reaction to people who are going to be taking damage immediately.

AOE Advice
General (AoE Advice)

Quick: Leave these options alone.
Advanced Set-up: Instead of showing how many people were in range of any particular raid member in the Clusters section, it selects only one “best” target for your smart heals such as Wild Growth. I recommend leaving Known Only checked, otherwise it will track every aoe spell listed, whether you have that spell or not. Sliding the refresh rate to a low number is a sure way to lower your framerate so make sure you are aware of what you’re doing if you adjust it. If you want to see the aoe heal target predictions only when the spell is off cd (if the heal has a CD), you can check that here as well. The sliders for lower limit on HP of your heals can be adjusted according to what your stats are and how much your heals hit for.

Misc
General (Misc)

Quick: I recommend selecting Party under Hide standard and enabling Announce Resurrection, but these options could be left alone if you need a quick install and go.
Advanced Set-up: Under , if you already have a Unit Frame addon that does this for you, you can leave these settings blank; otherwise hide them. If you want to announce who you are rezzing, you can do that here under Announce Resurrection. If you want to change the text, just be sure to use vuhdo in the place of the target’s name. I don’t use the Global Cooldown feature, but it adds a nice little cooldown bar that lets you see instantly when the global cooldown is up. If you use Clique and/or Masque/Bartender then you would be interested in the options under Custom Addons. The D/C Shield feature uses macro slots to try to recreate the frames for you immediately after you log back in the middle of combat after a D/C. If you’re a stickler for macro space, and this happens rarely to you, check D/C shield to turn the feature off. Then, to recover your raidframes after you dc, do a /reload UI instead.

Indicators
General (Indicators)

Quick: Leave these options alone.
Advanced Set-up: This provides more flexibility for how you display information intrinsic to the Vuhdo frame. A typical ajustment might be your Aggro indicator as there is an “Aggro Line” option. I personally tend to specifically configure Mana Bar for Manabars: All Powers. You can also select a Custom Bouquet for your indicator (more about Bouquets below). Additional functions can be found under “More” next to the indicator you’re modifying. For example, in case of Health Bar indicator, this will contain options to invert the bars (bars grow as health decreases), change axis to vertical (bars will grow/shrink in vertical direction) or flipped (direction of growth changes from right to left).

Clusters
General (Indicators)

Quick: Leave these options alone.
Advanced Set-up: This will provide configuration if you find you need to adjust at what health level you want “Clusters” to show up. Additionally, the range slider allows you to change the range depending on your talents or glyphs and the health level slider adjusts when you want to see clustering. Source/destination offers options depending on the mechanics of your aoe spell. You need to adjust this to your type of aoe heal. For example CoH is cast on any target (not myself only) and it affects entire raid (not limited to group like PoH). The downside of clustering is that you can set it up only for one type of heal (eg. smart/group/reticle defined/cone). If you have more than one type of aoe heal this can be a problem. Therefore when you’re setting this up, you should pair it up with the display under AoE Advice above.

Bouquets
General (Bouquets)

Quick: Leave these options alone.
Advanced Set-up: The basic idea is that this gives you a section to change just about any setting and the way just about anything is displayed. This is where you can add your own Bouquets if you do not want to use solely the ones already provided. The image above is a sample Bouquet I created to track Shaman Shields all in the same corner (since only a single shield can be on a target at one time). First, under …or new Bouquet name, give it a name and select New. Then under …or enter Buff/Debuff/HoT name enter the spell name (be specific) and select the Add button at the bottom of the next panel. Do that for all three spells and you can track them as described later in this Guide. Additionally, the preset Bouquets for Role Icons, Alternative Powers, Statusbar: Always Full and Statusbar: Full if Active are worth exploring as they provide some powerful additional configuration.

VuhDo Guide: Introduction

Introduction

I’ve posted previously on choosing your healing addons. Unfortunately, I mention in that post that the best resource for configuring Vuhdo was done by Tamarind, which has since disappeared from the internet. The hole left by the loss of this wonderful guide hasn’t been filled completely since then. So, in an effort to provide a detailed reference guide to use when you have those “I have ____ situation, but the general guides don’t cover that” moments, I’ve come up with something close to Tamarind’s effort.

First time Vuhdo users should follow the information in the Quick set-up process (I have quick links below as well). However, if you have questions about specific options this guide will cover nearly every option listed in the Vuhdo configuration window. It is broken into sections corresponding to the tabs and “buttons” in the addon that can be referenced individually.

This guide is based on version 2.136, but it should still work for current versions until I can go through and include the updates. Furthermore, the addon is now being maintained by Zohar if you have any technical difficulties.

Following this set of guides from start to finish will walk you through the configuration needed to go from:
Starting
to:
Starting Point

Now Available! I have my basic profile and key layouts for druid and priest over at Wago.io. Check them out at this link.

Quick Set-up Steps:
Under the General tab: The important options here are to display the 5 man MTs when in LFG so that you can figure out who is your tank (e.g., the warrior or the dk?). The ability to hide empty panels, or even hide VuhDo when you are soloing. Finally, you will be interested in locking your panels so that you can’t move them around your screen. I recommend selecting Party under Hide standard and enabling Announce Resurrection, but these options could be left alone if you need a quick install and go.
Under the Spells tab: Set up your mouseover/click target healing key-binds. I’ve posted suggestions for your key-binds elsewhere. Select a Modifier Key if you are playing a Druid (or a DK) so that you don’t use your Battle Rez at inopportune times.
Under the Buffs and Debuffs tab: Enable any buffs that you want to watch (probably your main class buff) and then enable “missing”. Enable the Buffwatch window under General to display a window to track the buffs selected in the previous section. Enable the “In Fight” and “Bar” options under Bar Color if you are interested in showing missing buffs by coloring the unit bar according to the Panel choices.
Under the Panel tab: If you plan to heal 25-man raids or battlegrounds you may find that adjusting the max. Columns and max. Rows under Ordering allows you to fit your VuhDo panel(s) into your UI more easily. Otherwise leave these options alone. Adjust the height and width of your unit frames, the rest of the options will probably be sufficient as they are. If you want to show mana or energy bars adjust the Mana Bar Height under Custom settings. Under Bar Color select Class Col. to show your health bars according to the player’s class. Enable the Show Targets if you want to show player targets in your VuhDo panels. Enable the Show and Spell Info under the Tooltips section so that you can see your keybound spells. Select a Text Position, I recommend center of the unit frame, and enable the Show Hitpoints option. Under Own HoTs select a HoT position configuration, I prefer the corners of the unit frame from my grid days. Under HoT Order select your spells according to which position location you want to display them on. I have an example set-up for my priest in the image for this section.

Common Configuration Questions:
Quick FAQs for common configuration questions posed through google searches and/or forums are included below as they are identified.

Advanced Set-up:
Part 1: General Tab
General
Scanners
Threat/Incoming
Aoe Advice
Misc
Indicators
Clusters
Bouquets
– To configure role indicators to show on your raid frames.
Part 2: Spell Tab
Mouse
Keys Local
Keys Global
Misc
Hostile
Smart Cast

Part 3: Buffs and Debuffs Tabs
Config
General
Colors
Rebuff
Standard
Custom
Visuals

Part 4: Panel Tab
General
Sizing
Bars
Headers
Targets
Tooltips
Text
Hot Icons
Hot Bars
Misc

Part 5: Colors
States
Modes –
To configure life threshold colors
Powers
HoTs
HoTs #2
Classes –
To configure colors used for each class
Raid Icon
Target

Part 6: Tools and Move
Profiles
Key Layouts
Export
Panel Wizard
Reset
Move

Meme the Sixth

Another meme has taken the blog community by storm and it all started with my favorite gnome mage Gnomeaggedon. He decided to do one of those screenshot meme posts starting with the Sixth and it’s continued growing until it’s exploded. I would think he was a goblin mage if I didn’t know otherwise… So I decided to chime in here since I have not been tagged (yet). Also, based on Martha’s Tree I don’t know of any new bloggers that haven’t gotten involved so I won’t be tagging anyone myself. However, it’s been fun going through the “family tree” if you will…

Now on to my sixth image in my “sixth” folder, which since I only have 5 archive folders it’s the sixth one in my regular screenshot folder.

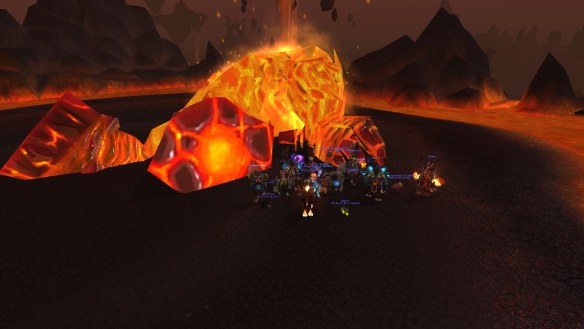
Lord Stompy Defeated

This is a Boss kill shot from back in August with my raid group which is composed of friends from 3 different guilds who get together twice a week for fun raiding. While we aren’t a “progression” raid group, we kill bosses while having a great time and still manage to keep up with the current content. So down with “Lord Stompy”!

Happy Healing!

“Force”-ably Detained

SWtoR Republic Classes

Yes, like so many other WoW players, I got sucked into the new hotness… and of course I’ve been playing a healer. Also, like so many other WoW guilds and raid groups, my guild and raid group have almost ground to a halt in terms of activity and progression. Granted there have also been a lot of real-life changes that have happened and the craziness of mine is only getting crazier, but the loss of people has taken it’s toll. However, my joy in WoW has not waned, but expanded due to my opportunity to explore SWtoR. So stay posted and content will be forthcoming, although I may sneak in some commentary on my experiences healing in SWtoR…

Hour of Twilight Healing 101

The final dungeon in the new set is probably my favorite of the three because it reminds me of a cross between Halls of Reflection and Escape from Durnhold. I’ll continue with the boss by boss rundown, with any notable trash mentioned, that you’ve come to expect. Again these instances represent content that is only relevant on heroic so the gear linked will be the heroic versions.

Arcurion
Following our theme of children’s games this instance is like one long game of tag with periodic breaks to rest. In the first encounter, Arcurion will cast Hand of Frost which should be interrupted. Everyone should be avoiding the Icy Boulders. Dispel Chains of Frost, especially from the tank and melee as they need to be able to move and position. At 30% health he starts to cast Torrent of Frost, an AoE damage that you will just have to heal through. Compared to the first boss in Shadowfang Keep you still might need to use cooldowns but you won’t have to worry about it occuring while the party is at low health to begin with.
Don’t forget to pick up your Urgent Twilight Missive for the quest, then talk to Thrall to continue on.

Gear
Surestride Boots – Shaman Boots +Haste/Mastery
Evergreen Wristbands – Druid Bracers +Crit/Mastery

Asira Dawnslayer
The Asira Dawnslayer fight is the most complex fight in this instance and definitely requires Tank and Healer situation awareness. Her main attack is Choking Smoke Bomb, just like Vanessa uses in Deadmines, except Asira casts it constantly. The tank should be kiting her out of the smoke bomb and next to the Rising Fire Totem cast by Thrall with their back to the casters/healers. This tactic is to avoid being silenced by Throw Knife. You will need to stand behind someone because her ability is a physical attack and will not penetrate to other targets. Alternatively, you can also stand behind Thrall and he’ll take the silence attack instead. Use of hots and shields are a good tactic because invariably she’ll cast smoke bomb immediately followed by the knife attack, so you will get silenced.
Don’t forget to pick up your Urgent Twilight Missive for the quest, then hop on one of Alexstrasza’s drakes to fly you to the next gauntlet.

Gear
Cloak of Subtle Light – Cloak +Mastery
Leggings of Blinding Speed – Druid Leggings +Haste
Pauldrons of Midnight Whispers – Shaman Shoulders +Crit

Notable Trash
The Shadow Borers (eye stalks) in each set of trash mobs leading up the the Temple cast Shadow Bore which will invariably target the healer, so pray the dps get that mob down fast. They don’t really need to be tanked, so a melee dps can serve as a “tank” for the time it should take to get them down.

When you reach the entrance of Wyrmrest Temple and Archbishop Benedictus runs out to talk with Thrall, do not run ahead into the temple proper without Benedictus and Thrall as there is a bug that will cause Benedictus to despawn and render you unable to complete the instance. There are reports that this bug is still occuring even though Blizzard has indicated it has been fixed.

Archbishop Benedictus
This final encounter is a two phase fight with basically two sets of the same mechanics except that Thrall will be imprisoned in phase 2 so that he can’t help you. The dps should be interrupting Smite and Twilight Blast, otherwise some targeted damage may need to be healed. In phase 1 Thrall will dispel Righteous Shear, however in phase 2 you’ll need to dispel Twilight Shear (since he’s imprisoned). Note that the debuff stacks to 2, so you’ll need to dispel it twice. Stay spread out to avoid and reduce the AoE effects of Purifying Blast and Twilight Bolt. Peroidically, a huge wave, either Wave of Virtue or Wave of Twilight, will cross the platform and can be prevented by standing in the Water Shell in phase 1 and/or just avoiding it in phase 2.

Gear
Stalk of Corruption – Staff +Haste/Mastery
Pauldrons of Conviction – Paladin Shoulders +Mastery

Well of Eternity Healing 101

Well of Eternity Loading ScreenThe next in sequence for the new instances is probably the longest of the three due to the amount of trash that needs to be cleared, so settle in folks. I’ll continue with the boss by boss rundown, with any notable trash mentioned, that you’ve come to expect. Again these instances represent content that is only relevant on heroic so the gear linked will be the heroic versions.
 

Peroth’arn
The first boss, Peroth’arn, following our theme of children’s games is a little like the game Blind man’s bluff. The encounter has two phases, starting with the Peroth’arn fight in phase one and the Eyes of Peroth’arn of in phase two. During phase one the tank will acquire Corrupting Touch, a stacking debuff that will eventually kill the tank, making the overall fight a DPS race. Throughout this phase Peroth’arn will cast Fel Flames on a random player, a smokey green circle will appear under you that you need to move out of. Furthermore, he will randomly target a player with Fel Decay, and any healing done to that player will cause you to suffer damage equal to the amount healed as Shadow damage. I’ve not had issues with healing it or not, so chose to heal the target based on overall party damage and your mana levels, as you could risk a player dying to the Fel Flames.

At 60% health Peroth’arn will cast Drain Essence and enter phase two in which his Eyes will spawn. Most groups will run to the pillars around the courtyard and evade them to let the shadowcloak buff stack for a bit. The longer you evade the eyes the more stacks you’ll get. However failing to dodge the eyes will cause the boss to stun you for 8 sec and increase his attack speed. Shaman and Druids can enter ghost wolf and travel form to avoid the eyes pretty successfully. Also, since everyone runs around spread out during the this phase the tank will not necessarily be close enough to the targeted player to taunt, so be prepared to lose a dps to his attack. This phase can be faked by having the tank purposefully attract the attention of an Eye so that they get the boss’ attack and returning to phase one. At 20% he goes into a frenzy and you need to burn him down. Also, if you plan to use heroism/bloodlust/timewarp during this fight, use it after the eye phase.

Gear
Horned Band – Ring +Crit/Haste
Orb of the First Satyrs – Reforgeable Off-Hand (DPS) +Hit/Haste

Queen Azshara
The Queen Azshara fight tends to be the most difficult fight in this instance because it requires cooperation and timing from the dps (which can be in short supply from pugs). In this encounter you don’t actually fight the Queen but her Enchanted Magi in three packs of two magi each activation. Each activation is on a timer so if the previous 2 don’t die, you will get the next two regardless. Throughout the fight she targets a random player with Hand of the Queen, causing them to become a puppet. Destroying the puppet strings releases the player from Azshara’s control, but during that time a lot of damage can occur from the controlled player. The other thing she does is a spell called Total Obedience, which is interruptible and should never be cast (shaman can help out if the damage is low at that point). The 3 types of Magi are Fire, Frost, and Arcane which will require you to spread out to avoid the AoE damage. The Arcane Magus does an AoE called Arcane Shock, which does a large amount of damage and can be interrupted which will save your mana so shaman may want to take care of this. The Fire Magus does a targetted AoE Firebomb and the Frost Magus will randomly charge a player as well as cast Coldflame, all good reasons to stay spread out.

After you defeat Queen Azshara and jump on the dragons, you can skip the cutscene by right right clicking the mount for the skip option. Or you can walk over to the portal and get ported down to the next encounter.

Gear
Scepter of Azshara – Mace +Crit

Notable Trash
At the Abyssal Doombringer, Illidan applies a buff called Waters of Eternity that reduces the damage done by the Abyssal’s fire attacks by 90%. However, this buff is range-based, so if you stand too far away from Illidan as he attacks the Abyssal, you will lose the buff. Next, you encounter three Shadowbats, with an ability called Displacement that makes them immune to non-AoE damage, so some spot healing might be called for until the dps figure out how to damage them.

Mannoroth and Captain Varo’then
This final encounter is a two phase fight with some various strategies depending on if you are working towards the That’s Not Cannon! achievement. In the first phase, you normally fight Captain Varo’then while Illidian and Tyrande fight off Mannoroth. However, if you are working on the achievement, the dps will be fighting Mannoroth to do about 10 million damage to him so that he kills the Captain for you. Throughout the fight Mannoroth will cast Fel Firestorm just like the first boss in Baradin Hold, ‘don’t stand in fire’.

The second phase begins after Captain Varo’then dies. If you don’t see a dps pick up his Magistrike Blade, make sure you pick it up and throw it at Mannoroth to apply Magistrike Arc. This fight is only complicated by the fel adds that the tank should be picking up before they reach you, but during Fel Firestorm you might pick up some of these adds so bring them back over to the tank. Finally, phase three will occur after Tyrande collapses, and at this point you may need to run into the Blessing of Tyrande to help corrall the adds and pick up the damage buff. If you can, pop a quick dot or something on the two Dreadlord Debilitators on either side. At this point the healing should be minimal and you can go to town on Mannoroth.

Gear
Foul Gift of the Demon Lord – Trinket +Int
Cowl of Highborne Sorcerors – Priest Helm +Crit/Mastery
Helm of Power – Paladin Helm +Haste/Mastery
Spaulders of Eternity
– Druid Shoulders +Crit/Mastery
Demonsbane Chestguard – Shaman Chest +Crit/Mastery

End Time Healing 101

End Time Loading ScreenDon’t worry the post title is not an indication of my leaving wow blogging, it’s just the name of the instance. These new instances are a lot more fun (and easier) than the troll heroics were when they came out, so the pugging is smoother and gives me a chance to check out fights more. I’ll continue with the boss by boss rundown, with any notable trash mentioned, that you’ve come to expect. Again these instances represent content that is only relevant on heroic so the gear linked will be the heroic versions.

This instance is kind of unique in that you are randomly ported to two of four different bosses and then face a third and final boss. So I’ll cover the four random pick bosses in alphabetical order to keep it easier to refer to this ‘guide’.

Notable Trash
The trash leading up to the Echo of Baine is some of the hardest hitting trash in this instance. The Time-twisted drakes have a fire breath and will place fire on the ground that needs to be moved out of immediately.

Echo of Baine (Obsidian Dragonshrine)
The Echo of Baine encounter is one that involves positioning since the boss changes the environment during the fight. Like much of this patch the boss fight is reminicent of a children’s game and in this case it’s leapfrog.
Start the fight with the melee and tank on the platform with the boss while the ranged and healer spread between the other three platforms. During the fight he will perform Pulverize and break a platform. Whichever platform is broken, the group/player on that platform should move to the remaining empty platform. The lava does a bit of damage so you’ll have to heal the group/player in the lava. Secondly, he’ll cast Throw Totem at a player, if you are targeted and the only person on your island that means you’ll have to throw it back to him. To throw the totem, click the totem on the ground and drag the targeting circle over to Bane and he should be stunned. Finally, he is temporarily buffed with Molten Axe when he touches magma, dispel the debuff from the tank (who should not be tanking the Boss in the magma so that the boss doesn’t get buffed).

Gear
Time Traveler’s Leggings – Priest Legs +Crit/Haste
Cord of Lost Hope – Druid Belt +Haste/Mastery
Waistguard of Lost Time – Priest Belt +Haste
Echoing Headguard – Shaman Helm +Haste

Echo of Jaina (Azure Dragonshrine)
Jaina is probably the easiest of the random bosses as she just plays tag. Start the fight by collecting all of the fragements around the bowl. Hopefully, the group also cleared all the trash mobs in the area too because Jaina Blinks all over the place and you will be chasing her around the entire zone. The fight is mostly dependent on a ranged (or the healer if no other ranged in party) stepping on the Flarecore ember to blow it up (minimal damage). If you don’t blow them up, they will detonate and do massive damage. Avoid the Frost Blades that she throws.

Gear
Jaina’s Staff – Two-handed Staff +Crit/Mastery
Ward of Incantations – Healing Shield +Haste/Mastery
Time Traveler’s Leggings – Priest Legs +Crit/Haste
Cord of Lost Hope – Druid Belt +Haste/Mastery
Waistguard of Lost Time – Priest Belt +Haste
Echoing Headguard – Shaman Helm +Haste

Echo of Sylvanas (Ruby Dragonshrine)
Sylvanas is a standard ‘don’t stand in fire’ fight with two phases, and is a little like the children’s game Red Rover. During the first phase, a ground phase, the party should stay spread out range 6 to reduce the damage from her targetted abilities. One of those abilities, Shriek of the Highborne, will deal about 75,000 damage to one person instantly, and debuff their movement speed to 50%. It can be dispelled, but should be easily avoidable, otherwise healing may be rough if the person is also targeted by Blighted Arrows. During the second phase Sylvanas will raise up into the air and do Calling of the Highborne. During calling she pulls the group in to her, then surrounded the group by a ring of Risen Ghouls and the purple blight. At this point the healing is minimal and you can help kill the targeted ghoul. Once the add is down run through the gap in the purple blight. Sylvanas will drop back down and phase one will resume.

Gear
Time Traveler’s Leggings – Priest Legs +Crit/Haste
Cord of Lost Hope – Druid Belt +Haste/Mastery
Waistguard of Lost Time – Priest Belt +Haste
Echoing Headguard – Shaman Helm +Haste

Notable Trash
The trash leading up to the Echo of Tyrande is unique in that there is a 90% damage reduction debuff on them until they are pulled into the moonbeams. Additionally, there is an achievement for making it through this gauntlet without taking damage (Moon Guard), so expect some spot healing on the run.

Echo of Tyrande (Emerald Dragonshrine)
The Tyrande fight feels a little like Hopscotch if you’re the only ranged person in the group. As a ranged/healer, you will not want to stand within the water zone as she has a debuff (Lunar Guidance) which slows casting speed by 25%. However, you can stand at the edge of the water so that you don’t get the debuff, but also don’t have to worry about the twin eyes from Piercing Gaze of Elune moving behind you. The melee should be interrupting Stardust or you could be faced with massive AoE. The tricky part of this fight is the movement needed if you are targeted by Moonlance, which will stun you for 5 seconds. Both of these can and should be dispelled from the party if they get caught by them.

Gear
Crescent Moon – Priest Wand +Mastery
Whisperwind Robes – Priest Chest +Mastery
Time Traveler’s Leggings – Priest Legs +Crit/Haste
Cord of Lost Hope – Druid Belt +Haste/Mastery
Waistguard of Lost Time – Priest Belt +Haste
Echoing Headguard – Shaman Helm +Haste

Notable Trash
The two sets of trash before Murozond appears both contain two Infinite Suppressors which are the hardest hitting trash in this instance. They both cast Temporal Vortex and Arcane Wave and are hopefully being CC’d or interrupted.

Murozond (Bronze Dragonshrine)
The last boss in this instance is a little like a game of Musical Chairs, in which you start and stop the encounter, each time you “reset”, one of his abilities speeds up. The tank should be picking him up and tanking him away from and perpendicular to the Hourglass in the center. Make sure you are between the Hourglass and the boss when the tank pulls so that you start each “reset” close to the boss. When the tank pulls Murozond, a “copy” will be created of your health, mana, cooldowns, and position. One of the ranged players (which may be the healer) will need to stand near the hourglass to activate the Blessing of the Bronze Dragonflight. This will “reset” you back to the “copy” that Murozond made, also resetting aggro so watch popping those cooldowns right away. Remember he resets cooldowns and mana, so you should be going wild (yes, Flash Heal spam is viable). Throughout the fight he drops a Distortion Bomb at a random player which leaves an 8 yard radius “void zone” that needs to be avoided. The only other ability is Flame Breath which he casts roughly every 12-15 seconds hitting for an average of 55000-65000 HP. Finally, ‘standard dragon rules apply’, don’t stand in front of or behind the dragon. Once there are too many Distortion Bomb zones, or the group’s health/mana is dangerously low, click on the Hourglass and begin again. Note, that activating the Blessing of the Bronze Dragonflight will give you a 40% haste buff and speed increase. Also, if you are healing and on Hourglass duty, range can be an issue, so strategically moving for placement of the Distortion Bombs can be useful. A good time to hit the Hourglass is as soon as Bloodlust/Heroism expires or you have backed your way up to the Hourglass through strategic Bomb placement.

Gear
Distortion Greaves – Shaman Legs (DPS) +Crit/Haste
Mantle of Time – Priest Shoulders +Haste
Time Altered Legguards – Paladin Legs +Haste
Timeway Headgaer – Druid Helm +Crit/Haste

Behind the Wheel

Animated Hamster Wheel Just stopping by to let folks know that I’m still here, but “RL” stuff is keeping me busier than I anticipated. Hopefully I’ll be able to post more often when everything settles down. So stay tuned for posts on the new dungeons that came with patch 4.3. I’m sure we are all excited to see how the healing will be in these new ones…

Happy Healing!